Managing elevated privileges across cloud environments is one of the biggest security challenges facing modern IT teams. Permanent administrative access—known as “standing privileges”—creates a massive attack surface. If an account with standing Global Administrator or Subscription Owner rights is compromised, an attacker gains immediate, unrestricted control over your entire cloud estate.
Microsoft Entra Privileged Identity Management (PIM) solves this by introducing Just-In-Time (JIT) access control. Instead of leaving privileges permanently active, users are granted eligible assignments. When an admin needs to perform a task, they request role activation for a limited time window, backed by mandatory Multi-Factor Authentication (MFA), business justification, and optional approval workflows.
Prerequisites & Licensing Requirements#
Before enabling Azure PIM across your organization, ensure your environment meets the minimum licensing and administrative requirements:
1. License Requirements#
- Microsoft Entra ID P2 or Microsoft Entra ID Governance licenses are required for users who are assigned eligible roles or perform access reviews.
- Note: PIM for Groups and Azure Resource role activations require governance/P2 coverage for all participating identity accounts.
2. Administrative Roles Required#
- Privileged Role Administrator or Global Administrator permissions are required to manage role settings, assign eligibility, and configure approval policies.
Architecture: How Azure PIM Access Works#
The basic workflow of a Just-In-Time (JIT) activation in Microsoft Entra ID follows a strict control path:
Step 1: Configure Role Activation & Conditional Access Authentication Contexts#
Standard PIM MFA only checks if a user has performed MFA during their active session. By configuring Microsoft Entra Conditional Access Authentication Context, you can enforce strict, real-time security requirements—such as phishing-resistant MFA (FIDO2), compliant device checks, or forced re-authentication—at the exact moment a user requests role elevation.
-
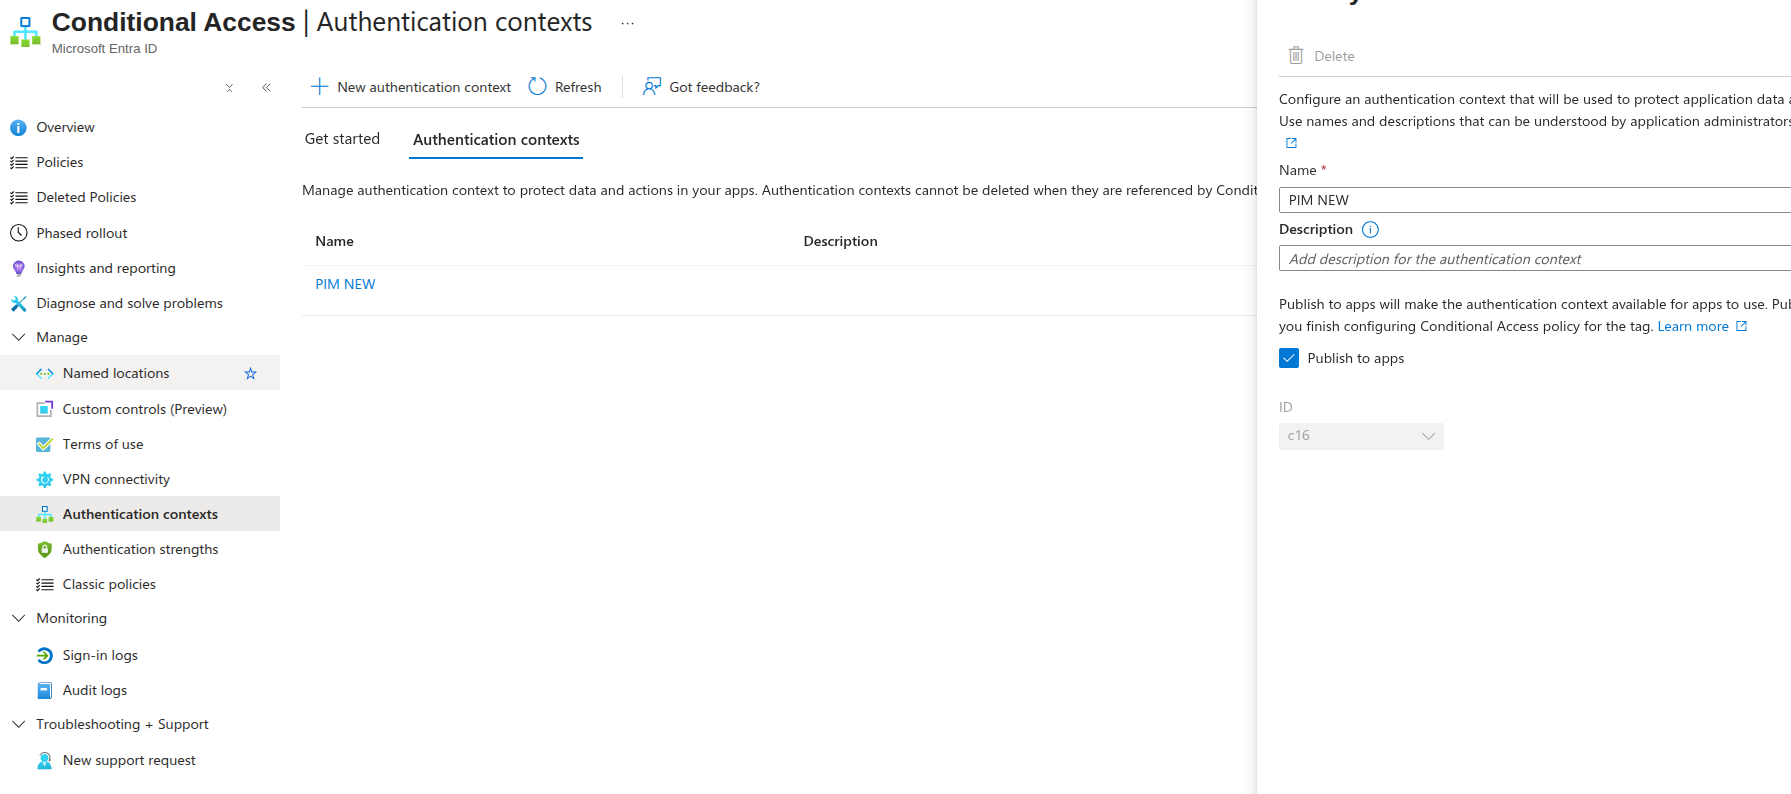
Create the Authentication Context in Azure Portal
- Open the Azure Portal and sign in as a Conditional Access Administrator or Security Administrator.
- In the top search bar, search for and select Microsoft Entra ID (formerly Azure Active Directory).
- In the left menu, navigate to Security > Conditional Access.
- Under the Manage section in the left pane, click Authentication context.
- Click + New authentication context at the top:
- Name: PIM-HighPrivilege-Activation
Description: Enforces Phishing-Resistant MFA and Device Compliance for PIM activations.
- Publish to apps: Ensure this checkbox is checked.
- Click Save.
-
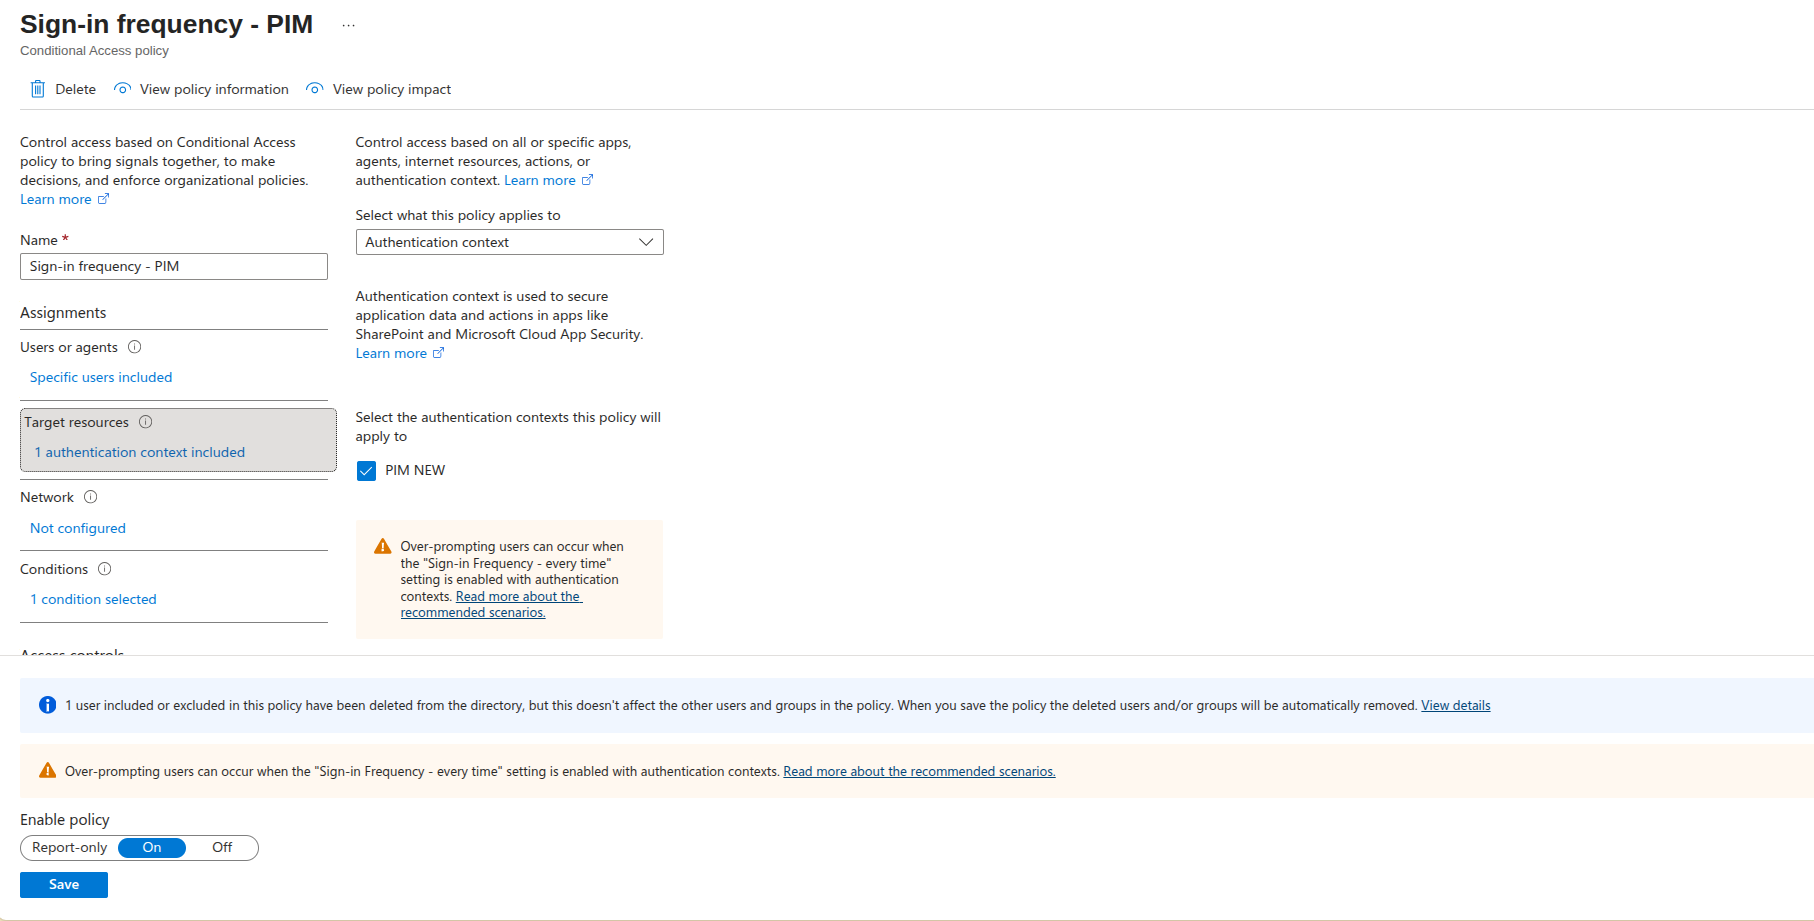
Create the Targeted Conditional Access Policy Crucial Rule: Always create and enable the Conditional Access Policy before linking the Authentication Context in PIM.
- While still under Conditional Access, select Policies > + New policy.
- Name: PIM - Require Phishing-Resistant MFA & Compliant Device.
- Users:
- Under Include, select All users or target specific Users and groups (e.g., eligible administrators).
- Target resources:
- Change the dropdown from Cloud apps to Authentication context.
- Select your created context: PIM-HighPrivilege-Activation.
- Access controls > Grant:
- Select Grant access.
- Select Require authentication strength and choose Phishing-resistant MFA (or select Require device to be marked as compliant).
- Access controls > Session (Optional):
- Select Sign-in frequency.
- Choose Every time to force re-authentication on every single role activation.
- Set Enable policy to On and click Create.
Step 2: Configuring PIM for Microsoft Entra Directory Roles#
Protecting high-level tenant admin roles (e.g., Global Administrator, Security Administrator, Exchange Administrator) is the first priority when onboarding PIM.
-
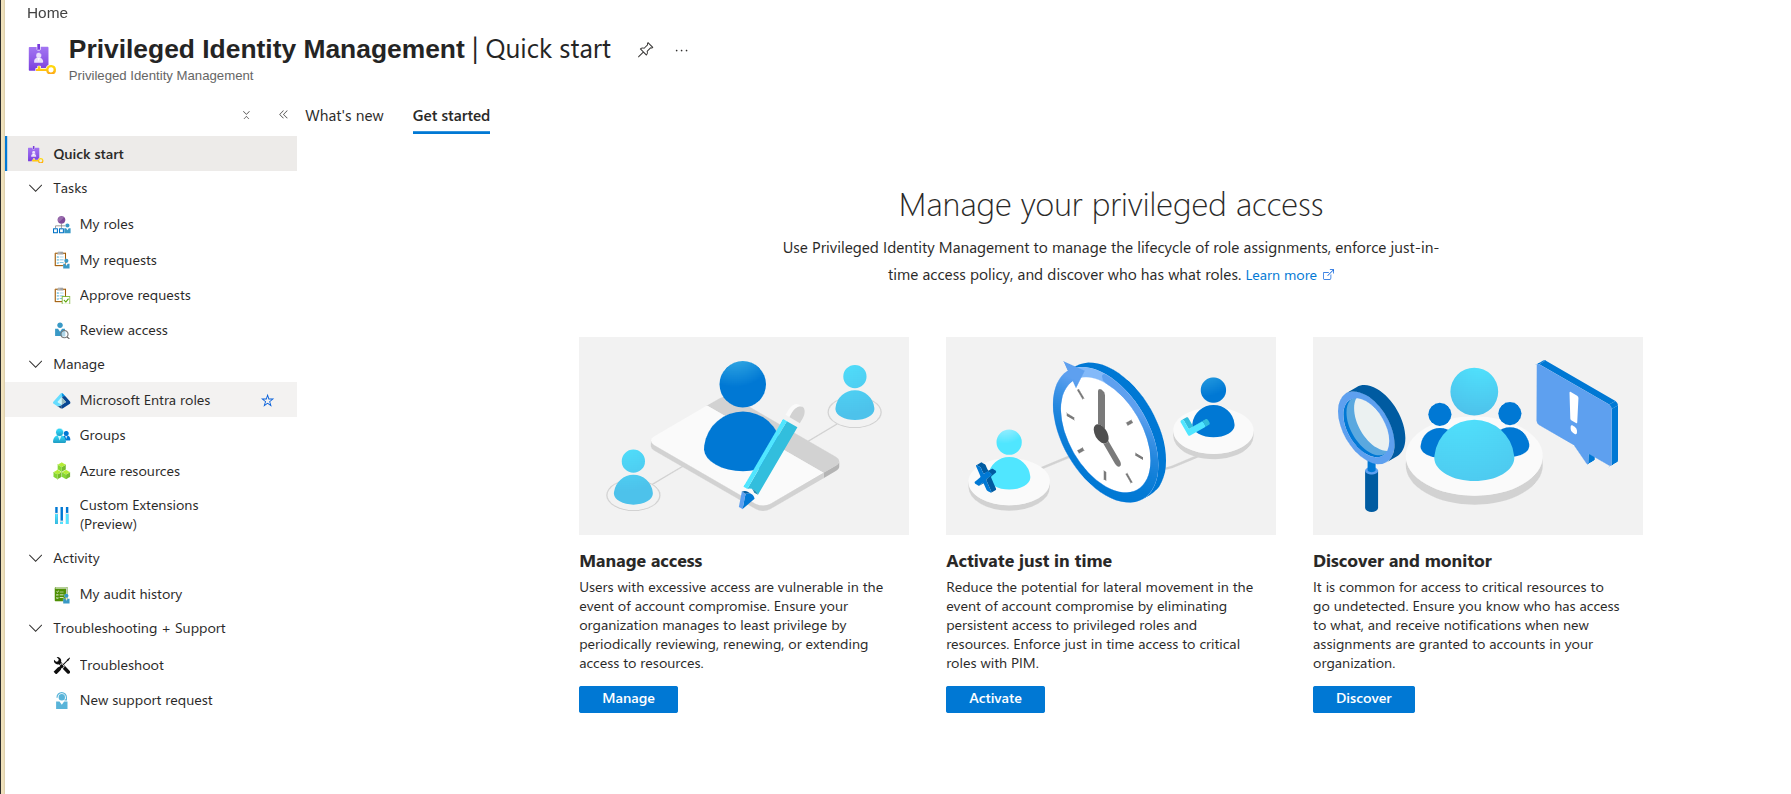
Navigate to PIM Settings
- Sign in to the Microsoft Entra Admin Center or Azure Portal.
- Search for Privileged Identity Management in the top search bar.
- In the left navigation menu under Manage, select Microsoft Entra roles.
-
Configure Role Activation Settings
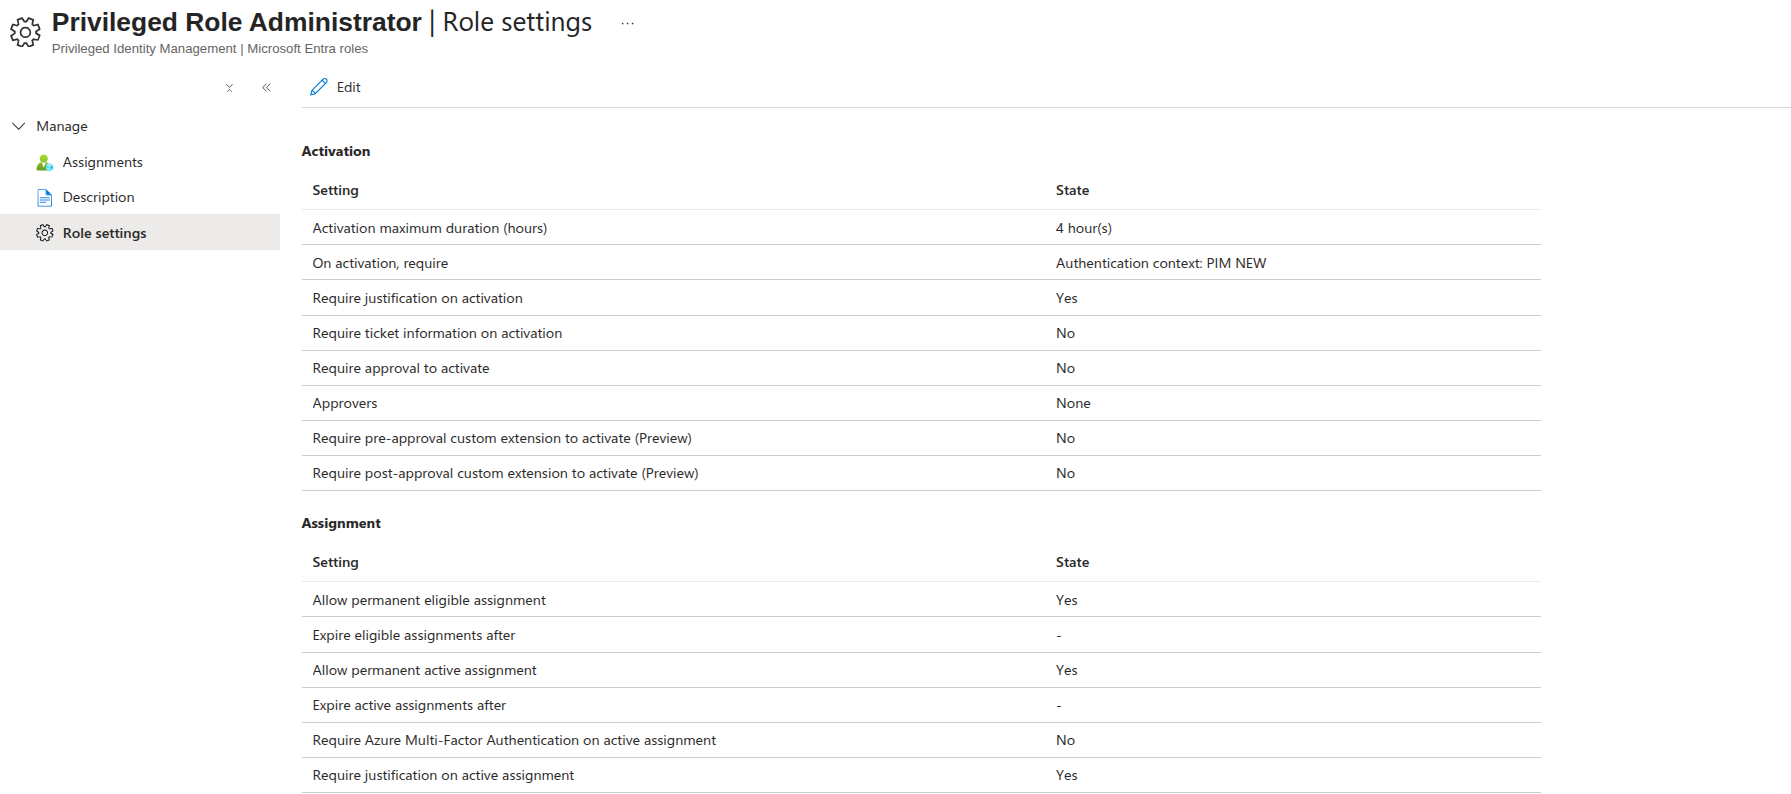
- Before making users eligible, define the security rules for role activation:
- Click on Settings under Microsoft Entra roles.
- Select a target role (e.g., Global Administrator or Privileged Role Administrator).
- Click Edit to adjust the role policies:
- Activation maximum duration: Set between 1 and 8 hours (4 hours is recommended for high-privilege roles).
- On activation, require: Check Azure AD MFA or Microsoft Entra Conditional Access authentication context.
- Require justification on activation: Enabled (forces admins to supply a ticket ID or business reason).
- Require approval to activate: Enabled (specify delegated approvers for critical directory roles).
Step 3: Assigning Eligible Role Rights#
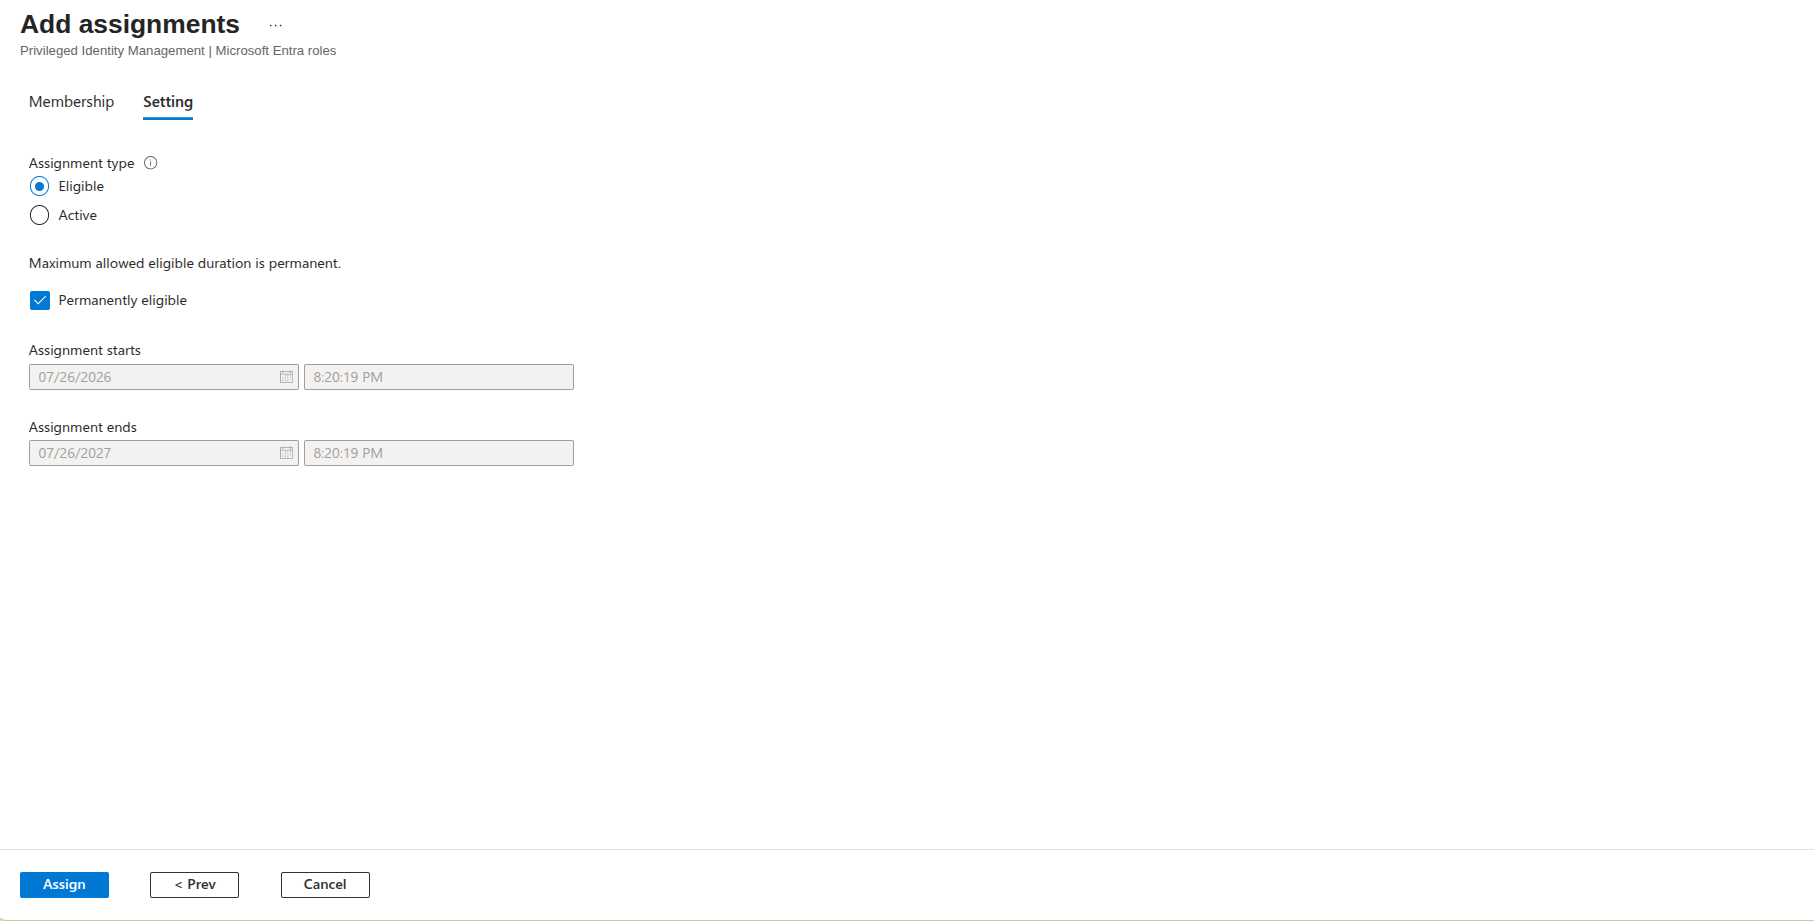
Once the role rules are configured, move standing admins into Eligible assignments.
- Navigate to Privileged Identity Management > Microsoft Entra roles > Roles.
- Click Add assignments.
- Under Select role, pick the role (e.g., Contributor or Global Administrator).
- Under Select members, search and select the target users or groups.
- On the Setting tab, configure:
- Assignment type: Change from Active to Eligible.
- Assignment duration: Set whether the eligibility is permanent or time-bound (e.g., valid for 1 year).
- Click Assign.
Best Practice: Aim for zero permanent Active Global Administrators. Keep 2 emergency break-glass accounts excluded from PIM (permanently active with long passwords in a secure vault), and make all standard admin accounts Eligible.
Step 4: Extending PIM to Azure Subscriptions & Resources (RBAC)#
PIM isn’t limited to Microsoft Entra tenant roles; it also manages Azure Infrastructure (Resource Manager RBAC) roles such as Owner, Contributor, or custom subscription roles.
-
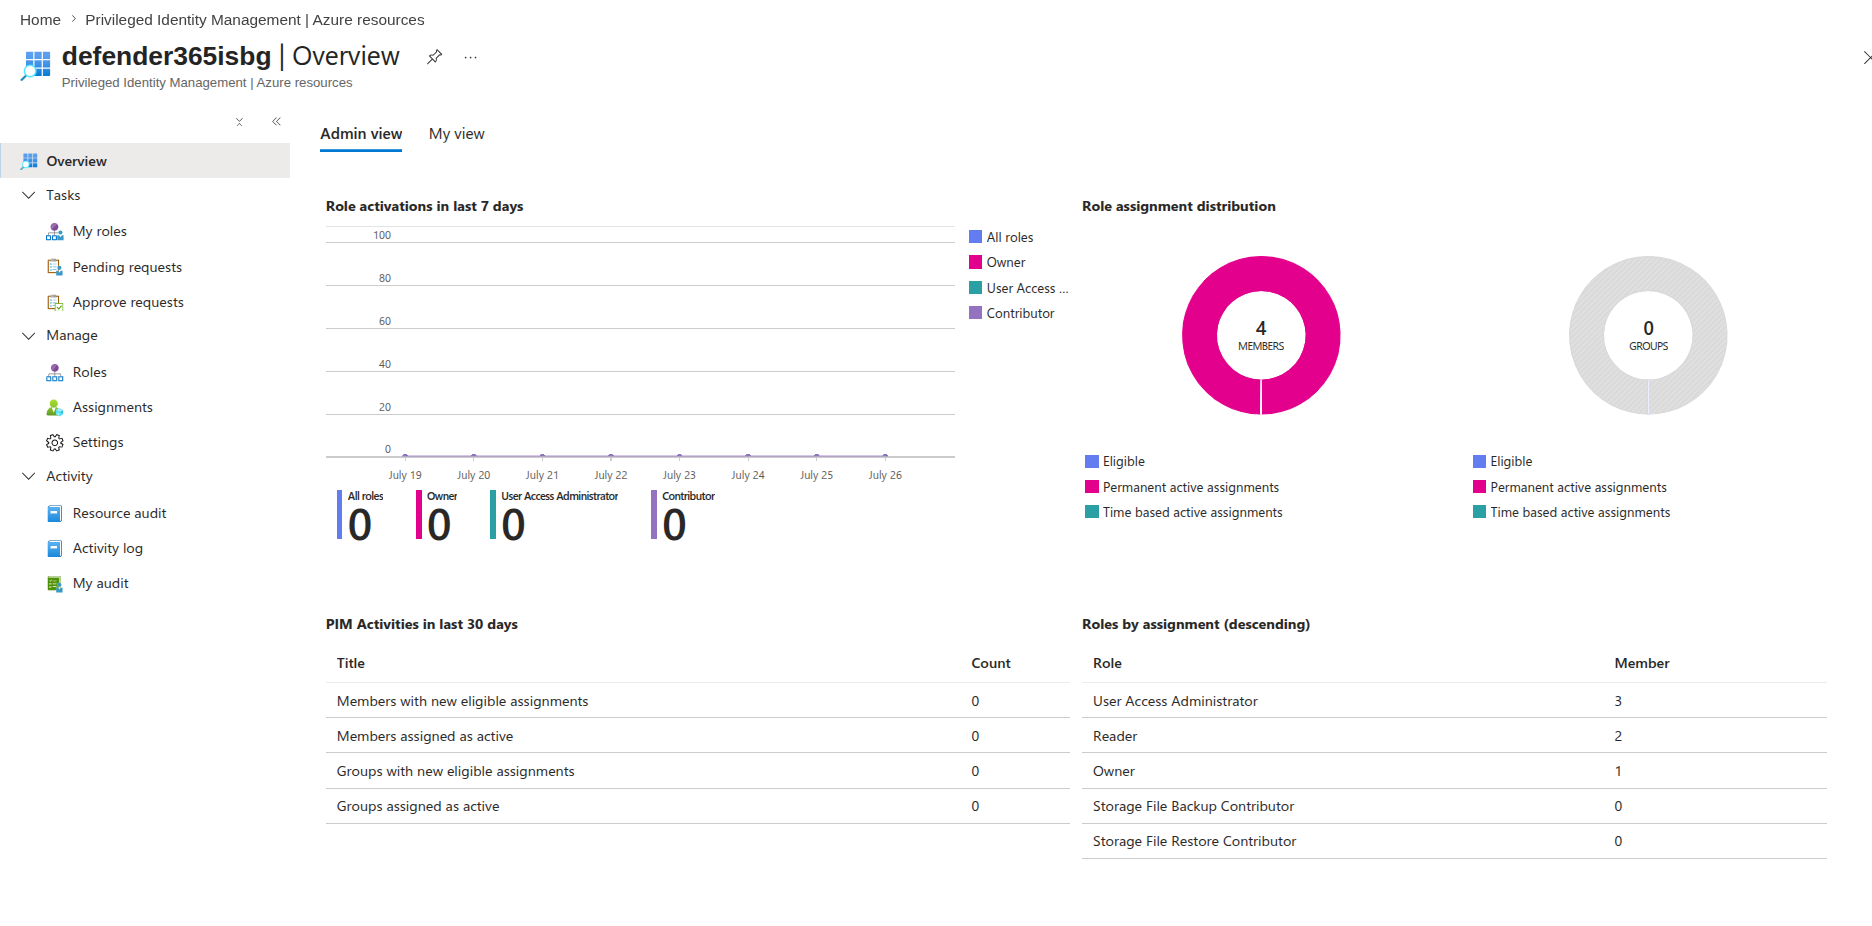
Discover Azure Resources
- In PIM, click Azure resources under the Manage section.
- Click Discover resources to scan your Management Groups, Subscriptions, and Resource Groups.
- Select the subscriptions or resource groups you wish to manage and click Manage resource.
-
Assign Eligible Azure RBAC Roles
- Select the target Azure subscription or resource group in the PIM console.
- Go to Roles and select a high-level role (e.g., Owner or Contributor).
- Click Add assignments.
- Set the Assignment type to Eligible.
- Save the configuration.
Step 5: Activating Eligible Roles (User Workflow)#
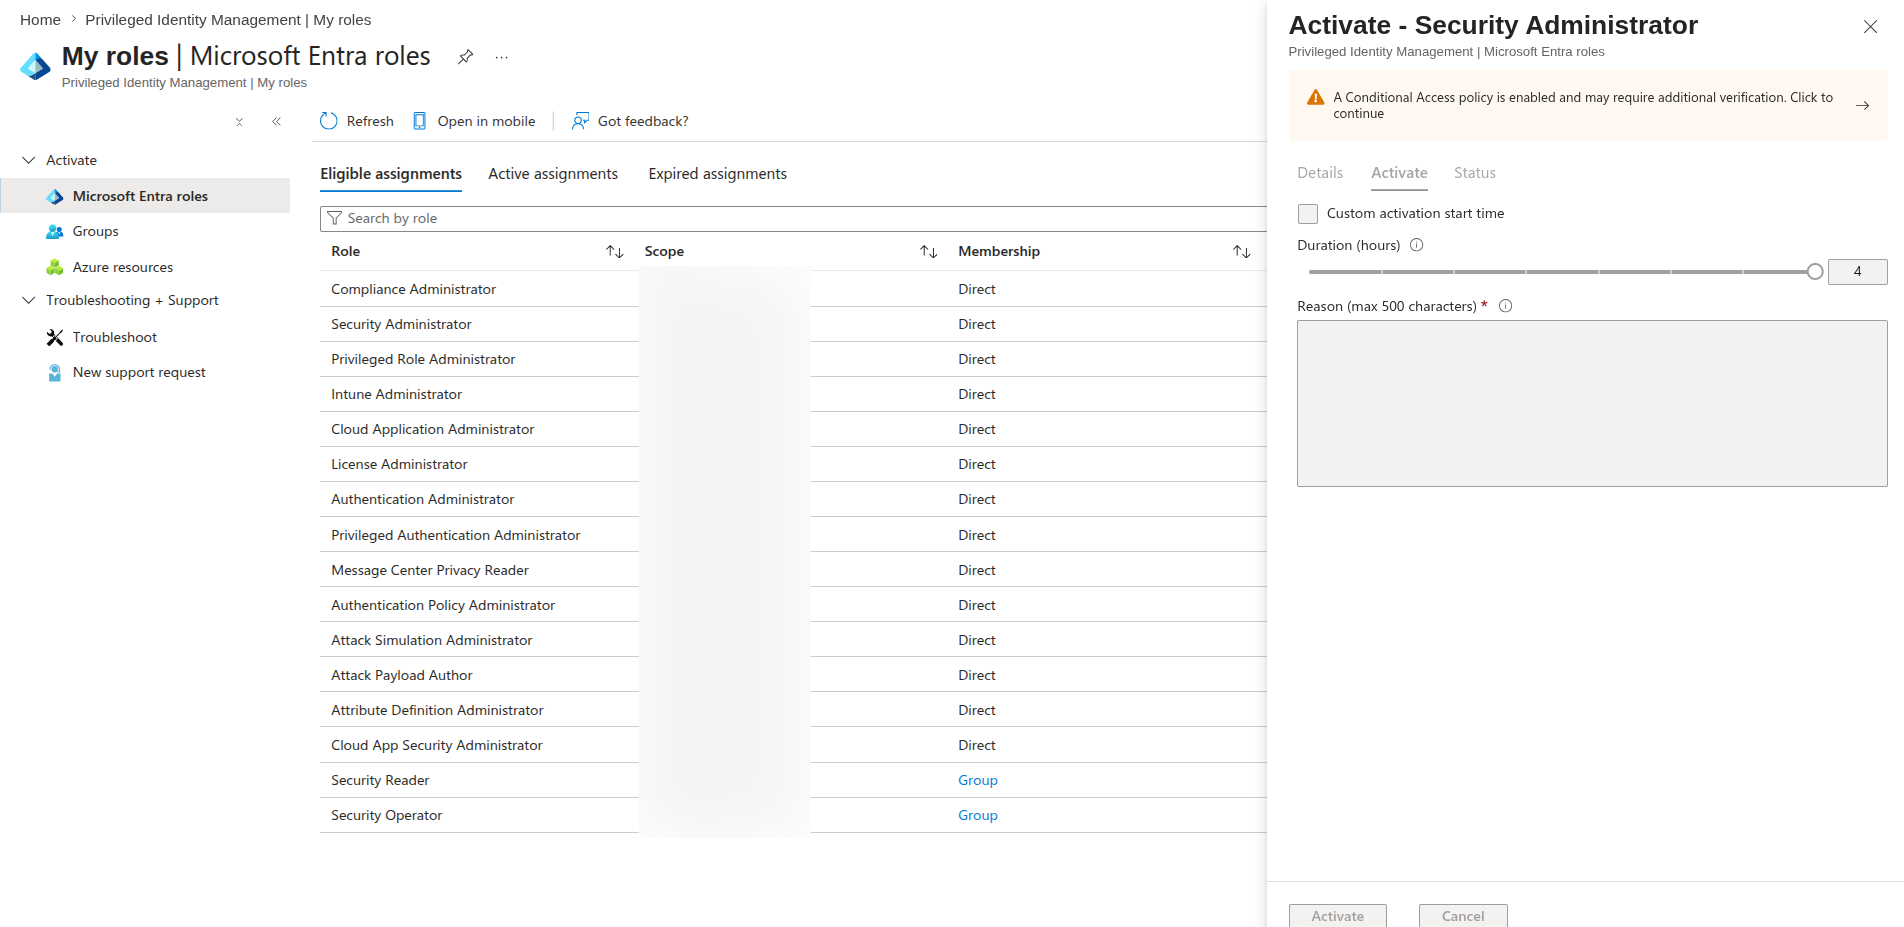
When an engineer needs to perform maintenance on a subscription or directory setting, they activate their role on demand.
- Requesting Activation via Azure Portal
- Open Privileged Identity Management > My roles.
- Under Eligible assignments, locate the required role.
- Click Activate in the action column.
- Specify:
- Custom activation start time (if scheduling future maintenance).
- Duration (hours): Select the exact time needed (e.g., 2 hours).
- Reason / Ticket Number: Enter business justification.
- Click Activate.